Showing posts with label how to. Show all posts

Tuesday, November 8, 2016

How to Auto Generate Short URLs of Your Bogger Posts

How to Auto Generate Short URLs of Your Posts in Blogger with Bit.ly

It is an online service that provides you short URLs of your posts so that you can share them with your friends, family, and on the web. This service is fairly popular on microblogging site twitter because it is the default shortening service since May 6, 2009. The shorten links created with this service are permanent and somewhat look like this http://bit.ly/6wgJO.

The First thing you will be doing is to login into your Blogger Dashboard. Now After logging in, go to your blog >> Template >> Edit HTML >> and search for the ]]>
tag. Once you find it, just above it paste the following CSS code.

Copy Below Code:

#shorturl {
float: left;
background: #F8F8F8;
padding-bottom: 10px;
border-top: 1px solid #d2d2d2;
border-bottom: 1px solid #d2d2d2;
padding-top: 10px;
width: 650px;
}
#shorternh2 {
float: left;
padding-left: 20px;
padding-right: 10px;
}
.textinpo {
float: left;
font-family: "verdana",helvetica,Tahoma,Arial,sans-serif;
font-size: 12px;
color: #666;
border: 1px solid #ccc;
border-radius: 3px;
background: #fff;
width: 215px;
padding: 0px!important;
padding-left: 10px!important;
height: 20px!important;
margin: -4px!important;
}

Now after pasting the style sheet coding into your template, it is time to move ahead, and get things a bit more serious. Again in the template, search for
Read More

Saturday, November 5, 2016

How to add Ajax Based Sitemap Widget For Blogger

Ajax Based Sitemap Widget For Blogger

Sitemap is a must have page for every blog, it can help to improve your blog navigation and also to reduce the blog's bounce rate. The sitemap widget we're going to add today shows a list of articles on the latest published order under each categories.

Also Read: How To Add Google+ Popup Followers Widget For Blogger

How To Add Sitemap Widget On Your Blog

Note:- Please create a back up of your template before you install this widget. To do this, navigate to "Template" and make a backup of your template by clicking on the "Backup/Restore" link at the top. Once the back up is over, follow these steps carefully.
Also Read: How To Add Facebook Popup Widget For Blogger 

Step by Step Tutorial How to Add Sitemap


  • On the Blogger Dashboard Go to Template > Edit HTML Button
  • Click inside the HTML Editor, Press CTRL+F (This will open a search form on the top right side of the HTML Editor)
  • Now search for </head>
  • Above that place the following code.
<style type='text/css'> .btnt-sitemap { border-bottom: 4px solid #444; } .btnt-toc-wrap { display: inline-block; font-family: "Century Gothic",sans-serif; width: 100%; } .btnt-toc-wrap .btnt-cat { background: #333; border-radius: 2px; color: #fff; font-size: 15px; font-weight: bold; padding: 10px 20px; text-transform: capitalize; } .btnt-toc::before { background: #333; bottom: 0; content: ""; left: 20%; margin-left: -10px; position: absolute; top: 0; width: 4px; } .btnt-toc { margin: 0; padding: 30px 20px; position: relative; } .btnt-toc li { list-style: none; margin: 0; padding: 0; position: relative; } .btnt-toc > li .toc-date { color: #999; display: block; font-size: 14px; font-weight: bold; position: absolute; text-transform: uppercase; top: 25px; width: 15%; } .btnt-toc > li .btnt-icon { background: #fff; border-radius: 50%; box-shadow: 0 0 0 4px #333; color: #fff; font-size: 1.4em; font-style: normal; font-variant: normal; font-weight: normal; height: 10px; left: 20%; line-height: 10px; margin: 0 0 0 -25px; position: absolute; text-align: center; text-transform: none; top: 30px; width: 10px; } .btnt-toc > li .btnt-post::after { border-color: transparent #f5f5f5 transparent transparent; border-style: solid; border-width: 10px; content: " "; height: 0; pointer-events: none; position: absolute; right: 100%; top: auto; width: 0; } .btnt-toc > li .btnt-post { background: #f5f5f5; border-radius: 5px; display: block; font-size: 15px; line-height: 15px; margin: 0 0 15px 23%; padding: 25px 30px; position: relative; } .btnt-toc > li .btnt-post a { color: #333; font-weight: bold; } .btnt-toc > li .btnt-post a:hover { color: #999; } </style>
 <b:if cond='data:blog.pageType == &quot;static_page&quot;'> <script type='text/javascript'> /*<![CDATA[*/ $(document).ready(function(){var static_page_text=$.trim($(".post-body").text());var text_month=[,"Jan","Feb","Mar","Apr","May","Jun","Jul","Aug","Sept","Oct","Nov","Dec"];if(static_page_text==="[sitemap]"){var postbody=$(".post-body");$.ajax({url:"/feeds/posts/default?alt=json-in-script",type:"get",dataType:"jsonp",success:function(e){var t=[];for(var n=0;n<e.feed.category.length;n++){t.push(e.feed.category[n].term)}var t=t.join("/");postbody.html('<div class="btnt-sitemap"></div>');$(".post-body .btnt-sitemap").text(t);var r=$(".btnt-sitemap").text().split("/");var i="";for(get=0;get<r.length;++get){i+="<span>"+r[get]+"</span>"}$(".btnt-sitemap").html(i);$(".btnt-sitemap span").each(function(){var e=$(this);var t=$(this).text();$.ajax({url:"/feeds/posts/default/-/"+t+"?alt=json-in-script",type:"get",dataType:"jsonp",success:function(n){var r="";var i='<ul class="btnt-toc">';for(var s=0;s<n.feed.entry.length;s++){for(var o=0;o<n.feed.entry[s].link.length;o++){if(n.feed.entry[s].link[o].rel=="alternate"){r=n.feed.entry[s].link[o].href;break}}var u=n.feed.entry[s].title.$t;var a=n.feed.entry[s].published.$t,f=a.substring(0,4),l=a.substring(5,7),c=a.substring(8,10),h='<span class="day">'+c.replace(/^0+/,"")+'</span><span class="month">'+text_month[parseInt(l,10)]+' </span><span class="year">'+f+"</span>";i+='<li><div class="toc-date">'+h+'</div><div class="btnt-icon"></div><span class="btnt-post"><a href="'+r+'">'+u+"</a></span></li>"}i+="</ul>";e.replaceWith('<div class="btnt-toc-wrap"><div class="btnt-cat">'+t+'</div>'+i+"</div>")}})})}})}}); /*]]>*/ </script> </b:if>

Final Step:


  • Now save your template.
  • After that On the Dashboard, Go to Pages > New Page
  • On the new page content after adding the page title and hiding the comments using options, add the following code in the page content area.

[sitemap]


For better understanding check the highlighted area in the below image.

How to add Ajax Based Sitemap Widget For Blogger

Now click publish button and check the published page to see the newly added sitemap widget.
I hope you liked this article and Ajax Based Sitemap Widget . This is a simple a widget to increase your fan following of your profile in order to Increase your blog traffic.
Read More

How to Add Facebook popup Widget for Blogger

Facebook popup Widget for Blogger:

Here’s a fantastic way to increase facebook likes for your blog or website. Add this enticing widget to your website and a facebook like box will pop up with the lightbox effect when a user visits your page.

Also Read: How to Add Google+ Popup Followers Widget for Blogger

What is Facebook popup Widget:

How it is useful for your Blog/Website? It is useful as a visitor click on your website there will be automatic popup of this widget. If a visitors wants to like your facebook page, he will like the page without doing anything further. 
Tags: Facebook popup Widget, Facebook, Facebook popup Widget for blogger, Facebook popup, Facebook Widget, Blogger widget, how to add popup widget, how to, blogger, Blogging tips

Also Read: How to Submit Your Blog and get Index in 24 Hours

How to Add Facebook PopUp Widget on your Blog:

  • Open the Blog on which you want to add this widget
  • Go to > Layout > Add a Gadget
  • Select HTML/JavaScript after this
  • Put this code given below
Copy The Below Code.

<style type="text/css">
/***********************************************
www.bloggingride.blogspot.com
***********************************************/
* html #exestylepopupdiv {position:absolute;}
#exestylepopupdiv {display:block; top:0px; left:0px; width:100%; height:100%; position:fixed; background-image:url('https://blogger.googleusercontent.com/img/b/R29vZ2xl/AVvXsEiv8HiWVTla3is8E1-uYEiyjqng5_W2kLI-5_Qdnq7t8YZU6Uwf3biaAwoPJyjfYJK-mSLWCgSAYbcSqv8ef0lwVZ7hBsjCauyV89dJjnNxabiMvs2f69aFYthbLZdVwjbYMgwipLYgkg/s128/exeideasopacity0.5.png');margin:0; overflow-y:auto;}
#exestylepopup {z-index:9999;background-color: #fff; overflow:none;}
.exestylepopup {width:400px; height:440px; position:fixed; top:45%; left:50%; margin-top:-220px; margin-left:-200px; border: 10px solid #999; padding: 20px;}
.exe-title {background:#000;color: #fff;font-size: 20px !important;font-weight:bold;margin:5px 0;border:20px solid #ddd;padding:10px;line-height:25px; font-family:arial !important;}
</style>
<!--[if lte IE 6]>
<style type="text/css">
/*<![CDATA[*/
html {overflow-x:auto; overflow-y:hidden;}
/*]]>*/
</style>
<![endif]-->
<div id="exestylepopupdiv">
<div id="exestylepopup" class="exestylepopup">
<center><h3 class="exe-title">Receive All Updates Via Facebook. Just Click The Like Button Below...</h3></center>
<center>
<div id='fanback'><div id='fan-exit'></div><div id='fanbox'><div id='fanclose'></div><div class='remove-borda'></div>
<iframe allowtransparency='true' frameborder='0' scrolling='no' src='//www.facebook.com/plugins/likebox.php?

href=http://www.facebook.com/Virtual-Study-Solutions-364090163924393&width=402&height=255&colorscheme=light&show_faces=true&border_color=%23E2E2E2&stream=false&header=false'

style='border: none; overflow: hidden; margin-top: -19px; width: 402px; height: 230px;'></iframe>
</div></div>
<script type="text/javascript">
(function() {
window.___gcfg = {'lang': 'en'};
var po = document.createElement('script');
po.type = 'text/javascript';
po.async = true;
po.src = 'https://apis.google.com/js/plusone.js';
var s = document.getElementsByTagName('script')[0];
s.parentNode.insertBefore(po, s);
})();
</script>
</center>
<br />
<center style=" float:right; margin-right:35px; font-size:9px;" >Powered By <a style=" font-size:9px; color:#3B78CD; text-decoration:none;" href="http://bloggingride.blogspot.com/">Blogging Ride</a></center>
<center style=" float:left; margin-left:35px; font-size:9px;cursor:pointer;" ><a style=" font-size:9px; color:#3B78CD; text-decoration:none;" onmouseup="document.getElementById('exestylepopupdiv').style.display='none'">Skip To Continue</a></center>
</div>
</div>
<!-- www.bloggingride.blogspot.com -->

Final Step:

Now Change The “Red” Color Text With Your With your Google+ Profile Link.
and “Blue“ Color Text With Your Text.(What You Want To Show On the widgets head
Click Save and you are done.

I hope you liked this article and Facebook Pop Upwidget. This is a simple a widget to increase your fan following of your profile in order to Increase your blog traffic.
Read More

How to Add Google+ Popup Followers Widget for Blogger

What is Google+ Widget.

As you know Google+ is the part of Google Like Blogger. It will inform all your friends or followers to whenever you post a new article to your blog. It creates a reader of your blog. It also helps to better rank in Google Search Result. best practice to generate traffic from google.

Also Read: How to Add Facebook popup Widget for Blogger

Advantages Of Google+ Popup Widget

  • Google+ Popup Widget Has simple Layout which Doesn’t affect The blog loading Time.
  • Nice and simple Style which attracts the reader to follow your or your blog page.
  • Google+ Popup Widget is Made with CSS and Java script.
  • Automatically appears when the homepage loads.
  • Shows the number of followers with little Image.
  • Having a skip button to skip this widget.

Also Read: How to Submit Your Blog and get Index in 24 Hours

How to Add Google+ Popup Followers Widget For Blogger

If you are following some Pro bloggers then you might hear about the importance of social networking site. You can see many bloggers are using Social widgets like Facebook Like a box, Google+ Follow widget, etc. In their blog to increase social fan following. In this social war Google+ has also own impact. Google+ is a part of Biggest search engine Google. You can find Google+ followers widgets in almost every blog or website. Here is a popup widget for your Blogger blog to increase your fan following. Best responsive blogger templates 2015 free download.

Also Read:  How To Improve Alexa Rank Of Your Blog

Step by Step Tutorial to Add Google+ Popup Widget

Follow the Below Step To Add this awesome widget to your Blog.
  • Log in to Blogger.
  • Select your blog (If You Have More Than One Blog)
  • Now go Layout And Then Select “Add Gadget“.
  • In the new Window scroll down and Find “HTML/JAVA Script“
Paste The Below Code.

<style type="text/css">
/***********************************************
  www.bloggingride.blogspot.com
***********************************************/
* html #exestylepopupdiv {position:absolute;}
#exestylepopupdiv {display:block; top:0px; left:0px; width:100%; height:100%; position:fixed; background-image:url('https://blogger.googleusercontent.com/img/b/R29vZ2xl/AVvXsEiv8HiWVTla3is8E1-uYEiyjqng5_W2kLI-5_Qdnq7t8YZU6Uwf3biaAwoPJyjfYJK-mSLWCgSAYbcSqv8ef0lwVZ7hBsjCauyV89dJjnNxabiMvs2f69aFYthbLZdVwjbYMgwipLYgkg/s128/exeideasopacity0.5.png');margin:0; overflow-y:auto;}
#exestylepopup {z-index:9999;background-color: #fff; overflow:none;}
.exestylepopup {width:400px; height:440px; position:fixed; top:45%; left:50%; margin-top:-220px; margin-left:-200px; border: 10px solid #999; padding: 20px;}
.exe-title {background:#000;color: #fff;font-size: 20px !important;font-weight:bold;margin:5px 0;border:20px solid #ddd;padding:10px;line-height:25px; font-family:arial !important;}
</style>
<!--[if lte IE 6]>
<style type="text/css">
/*<![CDATA[*/
html {overflow-x:auto; overflow-y:hidden;}
/*]]>*/
</style>
<![endif]-->
<div id="exestylepopupdiv">
<div id="exestylepopup" class="exestylepopup">
<center><h3 class="exe-title">Receive All Updates Via Google+. Just Click The Button Below...</h3></center>
<center>
<div class="g-plus" data-action="followers" data-height="300" data-href="https://plus.google.com/+Zohaibk" data-source="blogger:blog:followers" data-width="310">
</div>
<script type="text/javascript">
(function() {
window.___gcfg = {'lang': 'en'};
var po = document.createElement('script');
po.type = 'text/javascript';
po.async = true;
po.src = 'https://apis.google.com/js/plusone.js';
var s = document.getElementsByTagName('script')[0];
s.parentNode.insertBefore(po, s);
})();
</script>
</center>
<br />
<center style=" float:right; margin-right:35px; font-size:9px;" >Powered By <a style=" font-size:9px; color:#3B78CD; text-decoration:none;" href="http://apk-free-downloads.blogspot.com/">Apk-free-downloads</a></center>
<center style=" float:left; margin-left:35px; font-size:9px;cursor:pointer;" ><a style=" font-size:9px; color:#3B78CD; text-decoration:none;" onmouseup="document.getElementById('exestylepopupdiv').style.display='none'">Skip To Continue</a></center>
</div>
</div>
<!-- www.bloggingride.blogspot.com -->

Final Step:

  • Now Change The “Red” Color Text With Your With your Google+ Profile Link.
  • and “Blue“ Color Text With Your Text.(What You Want To Show On the widgets head
  • Click Save and you are done.
Also Read: How to add Ajax Based Sitemap Widget For Blogger

I hope you liked this article and Google+ Pop Upwidget. This is a simple a widget to increase your fan following of your profile in order to Increase your blog traffic.
Read More

Friday, August 19, 2016

How to Submit Your Blog and get Index in 24 Hours

Where to submit your Blog

If you've just started Blogging. Let's start the list with Google Webmaster tools as it will be first step to get your site on search engines. Submit you blog to other sites it will help in better indexing and crawling of your blog. Especially when you create a new blog, it takes time for search engine bots to find your blog and crawl it, by submitting your site to these Websites which is listed below, it will help in faster indexing. Though if your sole motto is to let your site index in no time, So Below are few Blogging tools to index your site in 24 hours.
Also Read: How To Use Google Keyword Planner For Your Blog

Google Webmaster tool:

This is official Blogging tool by Google, where you can not only add your Website but also submit your sitemap to Google. This will ensure, Google will quickly crawl all your links and index them. More over, Google Webmaster Tool works as free SEO tool for your blog.
Also Read: How To Creat Advance SITEMAP For Your Blog

Bing Webmaster tool:

Official Webmaster tool by Bing, and like Google tool, submitting your blog to this place will ensure your site is visible in Bing. in Next posts we will soon Learn how to submit website to bing webmaster tools, and how to use bing webmaster tool.
Also Read: How To Improve Alexa Rank Of Your Blog

Alexa :

I’m sure many of you might not see Alexa as a credible source of ranking information and we have already discussed about this. Though, I always find alexa reporting to be useful and close to the accuracy and more over, it’s a useful place to find Keywords. We will talk about it soon in another article, but yes, you can easily learn How to Submit Website to Alexa.
Also Read: Most Advanced SEO Optimized Responsive Blogger Template

IMT Website submitter:

This is an online Blogging tool, which submits your Website to over 3000 places. For example, sites which stores site analytics, site price and so on. Those links might not be very high quality, but it will help in quick indexing, and improving back-link profile of your blog.
Read More

Wednesday, August 17, 2016

How to Add Google Adsense to Blog Header

How to Add Google Adsense to Blog Header

If you want to add Google Adsense Ads to Blog Header then follow the steps below:
You can also see the Demo.


1. Log in to Your blogger account >> Design >Edit HTML

2. Put check mark to "Expand Widgets Template"

3. Find this code, by using Ctrl+F

<div class='region-inner header-inner'>

4. you will find this code.

<div id='header-wrapper'>
<b:section class='header'
id='header' maxwidgets='1' showaddelement='no'>


5. Replace the read value like this

<div id='header-wrapper'>
<b:section class='header'
id='header' maxwidgets='3' showaddelement='yes'>


6. Click Preview and click save template.

7. After go to Page Element in Design tab.

8. Click Add Gadget and select Adsense.

You should Also Read about: Most Advanced SEO Optimized Responsive Blogger Template

9. Choose type you want.for example choose new linked 728x15 ad unit from the drop down
format menu for an Adsense ad that would sit above the blog title.and configure color.

10. Click save and view blog.

11. Enjoy. You Blog Header Ad is Ready.

Read More

How to Setup Feedburner for Blogger Tutorial

Feed burner

As Many of you may already know or heard of Rss Feed burner. Most people who are new to blogging, they don't know what is Rss feed and how important it is. Therefore i hope to write about What is rss,What are the benefits of using it and How to setup Feed burner properly.

What is a Feed burner

Feed burner is web feed management which helps to keep tracking favorite websites to users.
Millions of bloggers are using this service.Basically, As blogger we can use this service for
Distribute our blog's new updated to numbers of peoples who registered Feed burner via our blog. 

You must Read: How To Put Adsense Ad Code In Middle Of Blog Post

Why Feed Burner is Important for Bloggers

Feed burner is free service and it has a ton of great feature.These are some features,
  • Feed burner helps to analyze your blog and optimize blogger posts.
  • Users can subscribe via emails.
  • subscribes get a email when blog has updated with articles.
  • Feed burner allow to add Adsense ads for monetize your feed.
  • Automatically pin with online just from URL.
You Must Read: Most Advanced SEO Optimized Responsive Blogger Template

How to Setup Feedburner Step by Step Tutorial

How to setup Feed burner for blogger

1. You need to have Google account.Most of bloggers have it. Feedbuner Log in page

2. Now add your site and click Next

3. Add feed title and feed address.

4. Click skip directly to feed management.

Now you can see few blogging platforms. Ignore it and juct click optimize tab.

You must Read: How To Creat Advance SITEMAP For Your Blog

Configure RSS feed burner management


  • lets have a look at Optimize tab
In optimize, make sure you activated Browser friendly, Smart Cast and Smart Feed,Browser friendly make subscribe easier and smart feed helps to make your feed compatible with any feed reader application.
  • lets have a look at Publicize tab
In this option you need to activate email subscription for getting users to email updates from your blog. Ping shot also activate. It helps to notify interested services when your feed changes. Feed count helps to show off your subscribers counter.

Now you already created Feed burner account for your blog. So, your feed url should be like this.

http://feeds.feedburner.com/feed address you given

Example : http://feeds.feedburner.com/bloggingride

Redirect Blogger Feeds To FeedBurner

Important of Redirect Blogger Feeds To FeedBurner

  • Every subscribers will get same feed. ( Atom and RSS feed)
  • You can monitor blogger site growth from feedbiuner.
  • Help to indicate subscribers correctly.
  • It can help to increase your subscribers fast.
You Must Read: How To Use Google Keyword Planner For Your Blog

How to Redirect Blogger Feeds To FeedBurner


  • Add Your site Feed URL like above.
  • Now click save setting Button. You are done.
I Hope now you understand how to setup feed burner for your blog and how it works.
Read More

Tuesday, August 16, 2016

How to Use Google Keyword Planner for Your Blog

Google Keyword Planner

As You may Know Google has announced Keyword Planner which combine the keyword tools and traffic estimator. if your are a newbie and you want to build a successful blog first time of your journey will be use of Google keyword Planner for keyword research. Both tools are very useful for Google Ad Words account to identify estimated bids.So, Google has replace Keyword Tool and improve this new feature with this Keyword Planner.Therefore, I would like to explain how to use Keyword Planner for find better keyword for you blog. 

You should Also Read about : How to start a blog - step by step tutorial

What is Google Keyword Planner

As i said before, Google Keyword Planner is a updated version of Google Keyword Tool and Ad Words traffic estimator. This tool make easier for advertisers to creating new groups in ads campaign. It could use for keyword research in SEO.

How to use Google Keyword Planner

Hope you have a Google account.
Here’s the URL to get access to the tool: http://adwords.google.com/keywordplanner
In Keyword planner, there have 3 option and just pickup one path.

* Search for Keyword and Ad Group Ideas
* Enter or Upload Keywords to get Estimates
* Multiply keyword lists to get Estimates

You should Also Read about: How To Put Adsense Ad Code In Middle Of Blog Post

Search for Keyword and Ad Group Ideas

This is also same as Google Keyword Tool.But it has different interface.You can do research for ideas related to keywords,category and websites. There is a new feature in this Keyword Plan.It allows to "multiply" keywords or combine two or more keywords lists to generate new keywords And target countries and individual cities as well.

You can add URL for researching is as well.

If you want to do different types of research, You can click modify search button.
How it is looks like.

Exact match Here where can you change the keyword match types.

Note: If i change it to broad match or exact match result are same.may be its bug.If you have an idea, let me know about it.

You should Also Read about: Most Advanced SEO Optimized Responsive Blogger Template

Download keywords ideas

This is what we looking for.Now it has awesome feature."Segmanr statics by month"
Here it is.

Enter or Upload Keywords to See How They Perform
In second option of keyword plan is start research using own keyword list.This is also new feature.


You can start your campaign creation process using your own keywords list.There have 2 options to choose. Enter keywords and upload keyword list via CSV format.

You Should Also Read about: How To Creat Advance SITEMAP For Your Blog

Multiply Keyword Lists

This is also another new feature of keyword planner.It allow to multiply your keyword list with one another. This tool very useful to find and test new keywords.For example you might want to multiply Colors and Cloths.You can use this feature to automatically multiply keywords and get search volume .

If you want you can use 3 columns as well.


I think google keyword planner tool helps to building ads groups and campaign.So this is the best tools for keywords research.I hope this post is useful to know about Google keyword tool.
Read More

How to Put Adsense Ad code In Middle of blog Post

Google Adsense

If you want to put adsense ad code in the middle of your blog post, as it is easy to get
click frequently.So it wil help to earn more money.

How to Put Adsense Ad code In Middle of Blog Post

Follow the steps below.
1. First of all you have to parse the code.Go to these link
and parse the code. AdParser.

2.After log in to your blogger account and go to
dashboard >> Layout >> Edit HTML

You should Also Read: On-page SEO practices for Newbie Bloggers

3. Check THE "Expand Widget Templates" and
find this code by using Ctrl+F
<data:post.body/>

4.Now replace above code with this below code.

<div expr:id='"aim1" + data:post.id'></div>
<div style="clear:both; margin:10px 0">
<!-- Your AdSense code here -->
</div>
<div expr:id='"aim2" + data:post.id'>
<data:post.body/></div>


<script type="text/javascript">
var obj0=document.getElementById("aim1<data:post.id/>");
var obj1=document.getElementById("aim2<data:post.id/>");
var s=obj1.innerHTML;
var r=s.search(/x3C!-- adsense --x3E/igm);
if(r>0) {obj0.innerHTML=s.substr(0,r);obj1.innerHTML=s.substr(r+16);}
</script>


5. Now save the template. Now put this special code to your every post.
<!-- adsense -->
this is the place you want to put your adsense code.

6. Enjoy.

Read More

Monday, February 15, 2016

How to Submit Your Blog’s Sitemap to Google Webmaster

Submit Your Blog’s Sitemap to Google

When we create a New Blog one of the most common issues is how to list the site in search engines like Google. Submitting your Blog sitemap to google webmaster tools is a critical Step for your Blog Success as a Newbei.

Inside your Google Webmaster Tool dashboard, on the right-hand side you will see an option called “Sitemaps”. Click on “More” to see all submitted sitemaps, or you can submit a new sitemap from there. Click on “Add/Test Sitemap” to submit your sitemap file.

How to Submit Your Blog’s Sitemap to Google Webmaster

Submitting your Google Site's sitemap to Google Search Console

  • On your Search Console home page, select your site.
  • In the left sidebar, click Site configuration and then Sitemaps.
  • Click the Add/Test Sitemap button in the top right.
  • Enter /system/feeds/sitemap into the text box that appears.
  • Click Submit Sitemap.

If you are not aware of how the search engine optimiztaion works, they think that they need to pay Google or other search engines to list their website. This is is not true, of course. You can show your Blog in a Google search for free. The only thing you need to work on is helping Google to find your blog.

What is a sitemap for Blogger?

A sitemap is an XML file that contains the URLs inside your blog. This file helps crawlers to find all of the URLs of your blog. There are many aspects of your site that a crawler will follow, such as the size of your sitemap and the number of URLs in your sitemap. In short, a sitemap is a complete index of your blog that you want search engine bots to see

When we submit a sitemap to Google, we do so using the Search console tool. Assuming that you have already verified your site in Google search console and that you have logged in to your webmaster tool dashboard here.

you have your sitemap link ready to go. If you have used an offline tool to generate your sitemap, upload it to the root of your site like this: /sitemap.xml

Inside your Google Webmaster Tool dashboard, on the right-hand side you will see an option called “Sitemaps”. Click on “More” to see all submitted sitemaps, or you can submit a new sitemap from there.
Read More

Friday, January 9, 2015

How to start a blog in 2016 - step by step tutorial

My name is Zohaib Khan and I am going to be your guide on How to start a Blog in 2016 and building a successful blog. What is a blog?. Blogging is about sharing your knowledge with the world. Choosing a topic that you are passionate about makes the process of starting a successful blog so much easier. I have been building blogs and websites since 2002. In that time I have launched several of my own blogs, and helped hundreds of others do the same. During this time, I have discovered that to become a successful blogger there are 3 very important things.
  1. Setting up your blog correctly
  2. Having a passion for your Blog topic
  3. Learning from others
I am not ashamed to admit that when I was first learning how to build a blog I made a ton of mistakes. You can benefit from more than a decade of my experience so that you don’t repeat these same mistakes
How to start a blog in 2015 - step by step tutorial

Thinking that you’d like to start a blog in 2016 ??

Or you have already started one and want to stay up with the Latest Tips and Tricks

This article is for you..!!

In this post I’m going to show you some really important tips you need to know about starting your first blog in 2016. if you follow these tips you can save a lot of time and energy.

What’s Special about starting a blog in 2016?

Some things never change when it comes to blogging.

it can be really confusing if you’re new or just looking to get started:
these few questions come to our mind when we start a Blog

“Where do I start a blog?”

“Should I use WordPress or Blogger or Tumblr?”

“Do I need Feedburner for my mailing list?”

“Should I update my blog daily?”

“How should I monetize my blog?”   e.t.c.,....

These types of questions are timeless but the answers often change from year to year. And even if the answers don’t change it is sometimes necessary to remind bloggers that the answers haven’t changed! That is: keep doing what you’re doing.

Why you should start a blog and join bloggers community

I’m going to outline exactly what you need to do to get started and set up your own personal blog. Before we dive in though, I really want to talk about WHY you should start a blog.


  • Blogging has quickly become one of the most popular ways of communicating and spreading information and news. There are literally millions of blogs online (don’t worry, you can make yours stand out and get noticed!).

  • It’s a great way to express yourself and also a fantastic way to share information with others.
  • You become a better person and a better writer.
  • The best reason? You can make money Blogging.
May be you already knew all of that, but it’s nice to be reminded.
One very last thing before we get started: May be
Creating your own blog can take a little while, probably up to 30 minutes. So grab yourself a coffee or juice (whatever you fancy) and let’s get stuck in. If you need any help during the set-up process, You Can ask me for help here  and I’ll help as best I can and answer any questions you might have).

 How to Start a Blog on Blogger 


How to start a blog in 2015
Blogger is an online service owned by Google that publishes single or multi-user blogs created entirely by the user. The service has quickly become the preferred choice of many bloggers and is one of the easiest methods of creating and publishing a blog for free. If you are unfamiliar with the service, this article will teach you how to set up an account and create a blog on Blogger.com.

Today i will show you how with our Free and easy-to-follow step-by-step tutorials. 
You can Start a blog in 5 minutes.
Lets Start..!!

Step 1: 

Navigate to www.blogger.com using your web browser of choice.


Step 2: 

Sign in using your Google Account to get started in blogger.

Step 3: 

If you do not have a Google Account, click “Get Started” to create one.


Step 4: 

Enter a “Display Name” to be used to sign your blog posts and click “Continue”.

Step 5: 

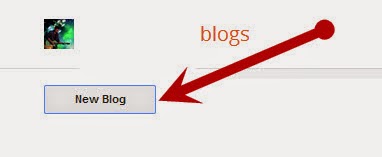
Click “Create Your Blog Now”


Step 6: 

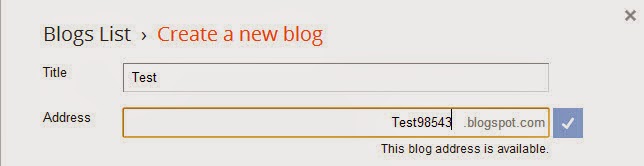
Select a “Blog title” and an available URL for your blog. You can check if the URL you are considering is available by clicking "Check Availability".

Step 7: 

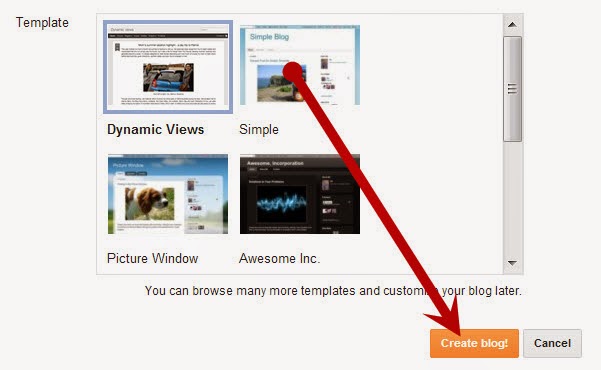
Choose a starter template, which will act as the basic design/layout of your blog.

Step 8:

Click “Start Blogging”


Step 9: 

You can create new blog posts, edit posts, and edit pages from under the “Posting” tab.

Step 10: 

The title of your post goes in the text box next to “Title”.

Step 11: 

The body of your post will get entered into the “Compose” text editor, where you will also be able to access basic text editor functions such as font size, text color, the ability to insert links. You can also use the “Edit HTML” tab to insert your post in HTML format, if you prefer.
Start a Blog on Blogger Step 12.jpg


Step 12: 

You can now either select “Save Now” to save your post, “Preview” to preview your post before publishing to your blog, or “Publish Post” to publish your post directly to your newly created blog.
Start a Blog on Blogger Step 14.jpg

Step 13: 

If you wish to change the design of your blog from the starter Blogger template you selected when initially creating your blog, you can do so under the “Layout” and "template" tab. From within the “Layout Tab” you will be able to edit Page Elements, HTML, and change your template with Temple Designer.
Start a Blog on Blogger Step 15.jpg

Step 14: 

If you want to adjust other settings such as who is able to view, contribute to, or comment on your blog etc, click the “Settings” tab
You can adjust publishing, comments, archiving, permissions, and all other settings from within the sub-tabs located under the main “Settings” tab.
Start a Blog on Blogger Step 17.jpg

Step 15: 

You can add your friends as new authors that are able to write a new post and edit your blog by clicking the “Settings” tab> “Permissions” sub-tab, and selecting “Add Authors”.
Start a Blog on Blogger Step 18.jpg
Courtesy: wikihow.com

A Free Premium Seo Optimized Blogger Template 

Read More